Mastering Component Variants in Figma: A Comprehensive Tutorial
No results found
1/24/2024
Mastering Component Variants in Figma: A Comprehensive Tutorial1
Hello Figma designers! Today, we will delve into the world of Figma's component variants. This powerful feature allows you to streamline your design process, reduce complexity, and enhance organization2. Let's explore how to create, organize, and use component variants effectively in Figma.
Understanding Component Variants2
Component Variants in Figma allow you to create a group of components that share the same base properties. These variants can be easily browsed and used in your design, reducing the complexity of instances while preserving overrides2. They're particularly useful when designing interfaces with recurring elements that only differ slightly from one another.
When to Use Component Variants2
Use component variants when you have multiple versions of a component, such as buttons with different states or cards with different content. Variants keep all these versions organized under a single umbrella, making them easier to locate and use.
Creating Component Variants: A Step-by-Step Guide345
Step 1: Select Your Component3
To create variants, first select the component you want to make a variant of. This could be any component—button, card, icon, etc.
Step 2: Create a New Component Property3
After selecting the component, create a new component property. This property will define the variant. For instance, if you're creating a button with different states, your property could be "State" with different values like "Default", "Hover", and "Active".
Step 3: Select a Variant4
Once you've defined your property, select the variant you wish to create. For example, if you've defined a "State" property, you might select the "Hover" state to create a variant where the button changes appearance when hovered over.
Step 4: Resize the Component Variation Area3
To give yourself ample space to work, you might need to resize the component variation area. This step is particularly important when working with larger components, like cards or modals.
Step 5: Add New Variants3
Next, add new variants to your component. These variants will be defined by their properties and property values, which you can set and adjust as needed. Keep in mind that each variant should represent a different state or version of your component.
Step 6: Rename Variations4
To keep your work organized, it's a good idea to rename your variations. This can be done in the properties panel and should reflect the purpose or state of the variant.
Step 7: Move Variations Into Position3
After creating all your variants, you'll want to move them into position. This makes it easier to visualize the relationship between different variants and can help other designers understand your component system.
Step 8: Modify Variations3
Finally, you can modify your variations as needed. This might involve changing the color, size, or other attributes of a variant to represent different states or versions of a component.
Nesting Instances2
Remember that while variants are a powerful tool, they can also create complexity when used to excess. For complex components, consider nesting instances within other components to maintain simplicity and readability2.
Hopefully, this tutorial has given you a deeper understanding and appreciation for Figma component variants. With practice, you'll be able to use this feature confidently in your design workflow.
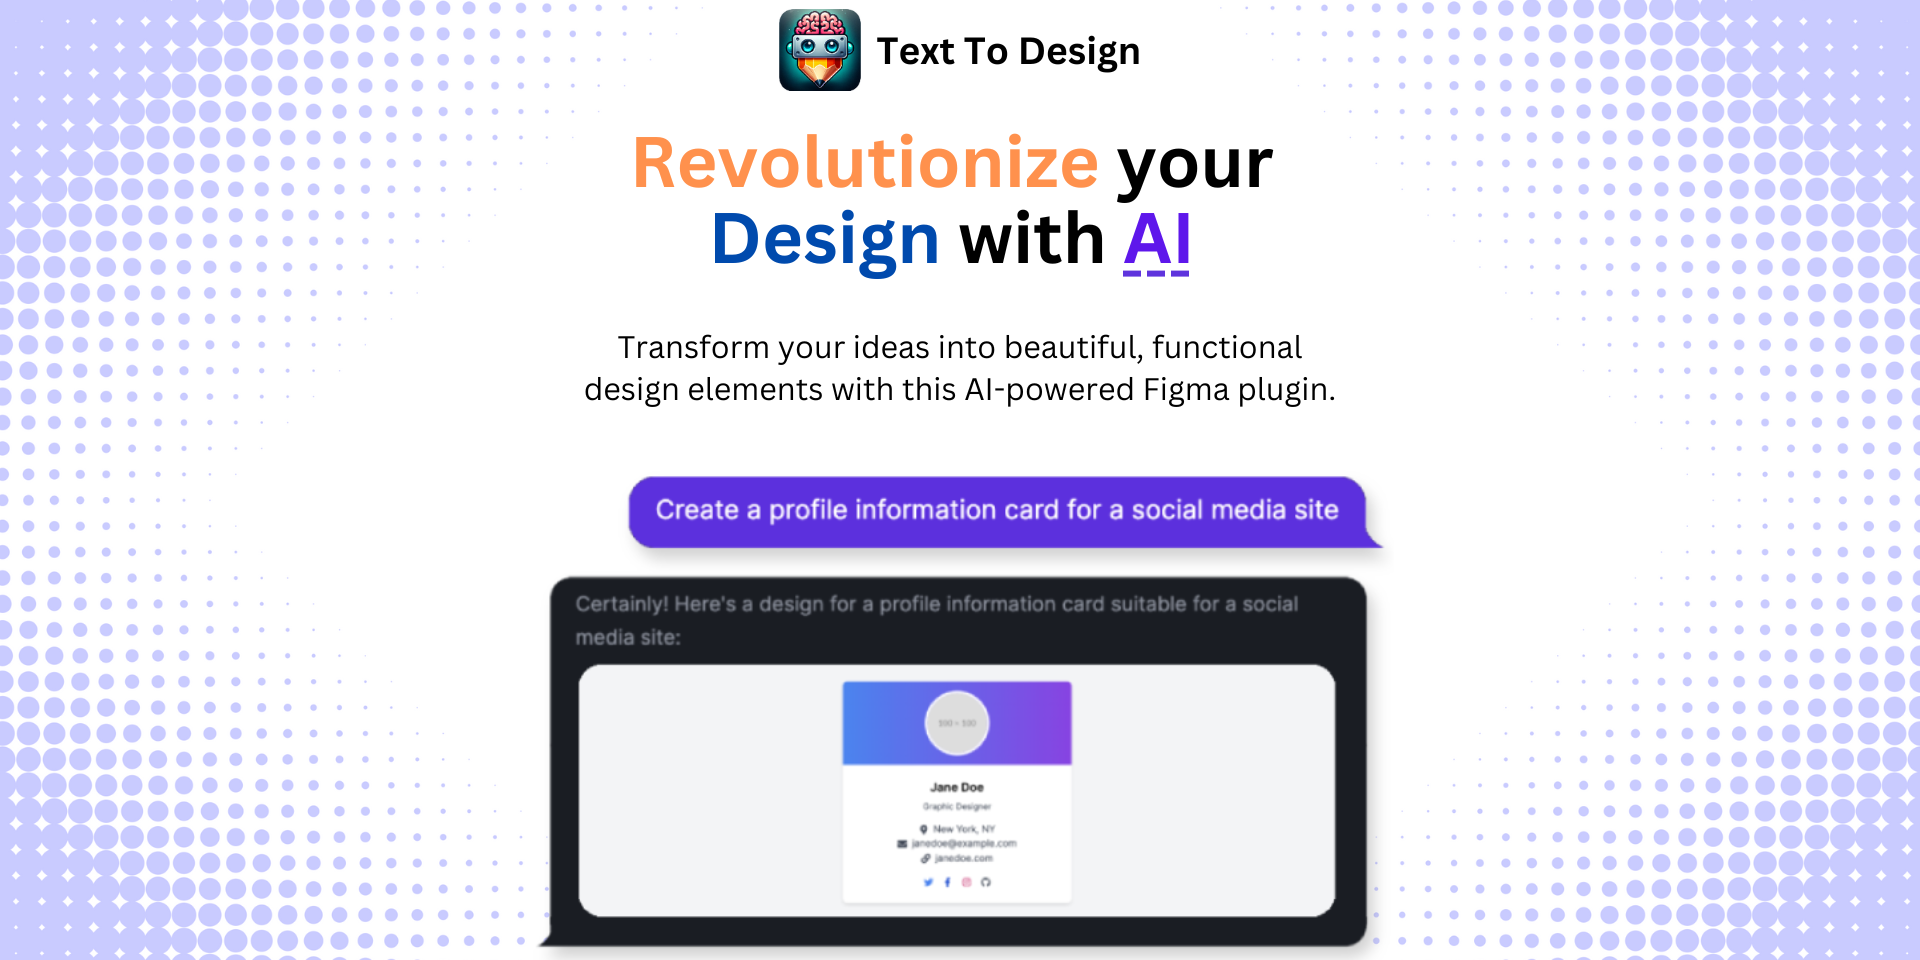
Enhance Your Figma Design Workflow with Text to Design AI Assistant6
While Figma provides powerful tools to aid your design process, you can take it a step further with our Text To Design Figma Plugin. This advanced AI-powered tool transforms your text descriptions into innovative design ideas, ideal for designers, developers, and creative teams6.
So why not give it a try? Enhance your Figma design process and let your creativity soar with the Text To Design Figma Plugin today!
Footnotes
Step Into the Future of Design with your AI Copilot
Join +40K designers revolutionizing their workflow with AI. Install our Text-to-Design plugin in just a few clicks to unlock your creative potential. Start for free and instantly generate designs for your project.